My Call List
Getting Started Guide
Contents
1Logging In
Accessing My Call List requires two steps: a Cloudflare Access authentication screen followed by a PIN screen inside the app.
Step 1 — Cloudflare Access
When you first open the app, you will see the Cloudflare Access screen. You have two options:
- GSign in with Google — tap the Google button and select your authorized Google account. If you are already signed into Google on your iPhone this may complete in one tap. Your device stays authorized for 30 days before you are prompted again.
- @Email code — enter your email address and tap Send me a code. Check your email for a one-time code and enter it to continue.
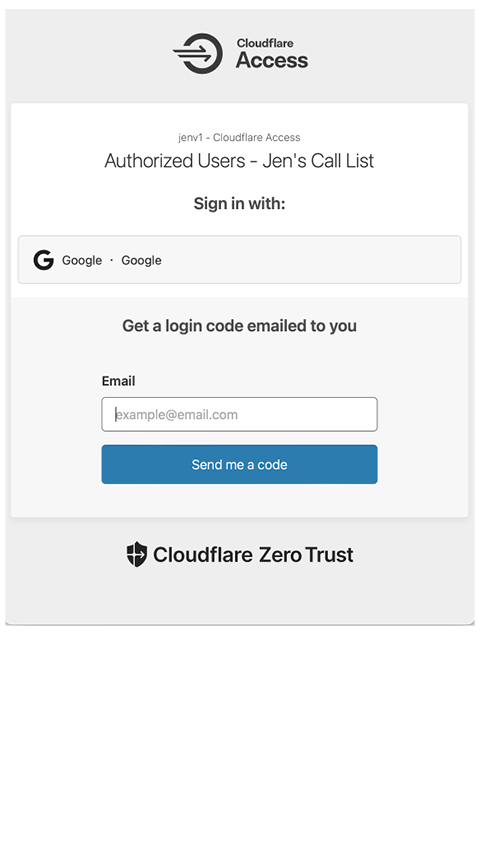
The Cloudflare Access screen — sign in with Google or request an email code
Step 2 — PIN
After Cloudflare Access, the app's PIN screen appears. Enter your 4-digit PIN and tap Enter.
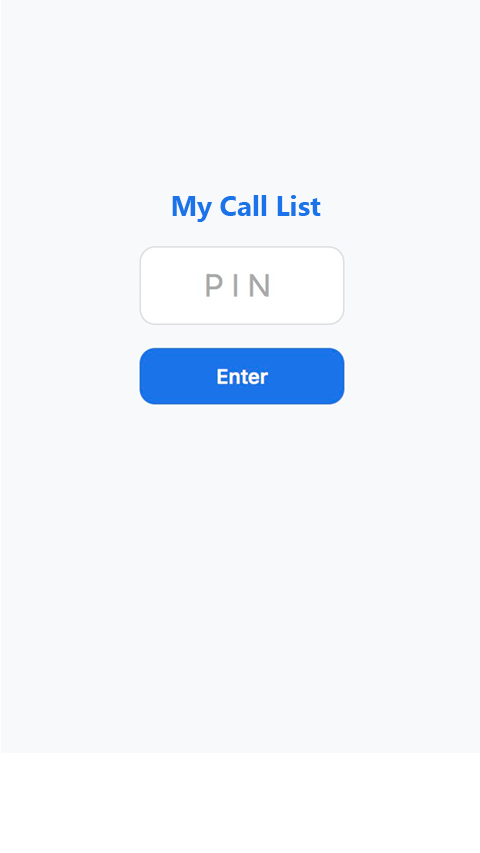
The PIN screen — enter your PIN and tap Enter
2List Options Overview
After logging in, you will see eight list options. Each one filters your contacts differently. Tap any option to load that list. A $ raised badge in the upper right shows the total donations recorded to date and updates each time you load a list.
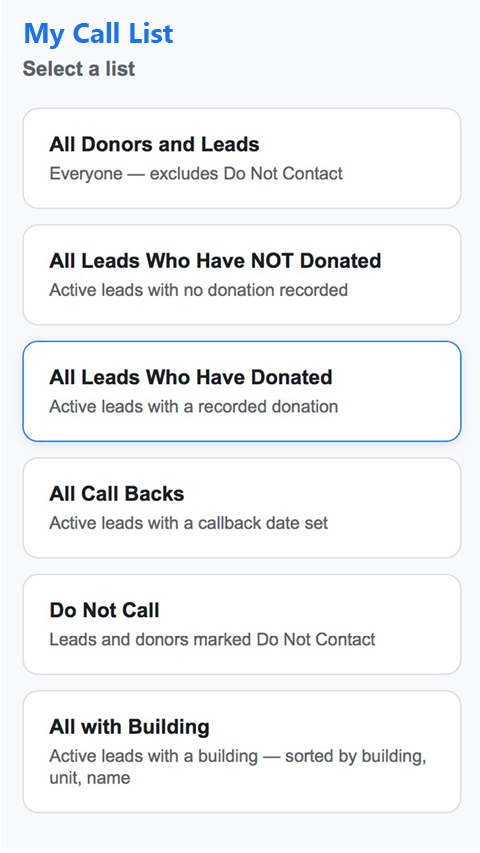
The eight list options
Prioritized Call List — Highest to lowest priority, excluding donors, pledges, and future callbacks. This is the primary working list.
All Call Backs — Active contacts with a callback date set, sorted earliest first.
Outstanding Pledges — Contacts with a pledge amount recorded.
All Leads Who Have NOT Donated — Active contacts with no donation recorded.
All Leads Who Have Donated — Active contacts with a recorded donation.
All Donors and Leads — Everyone in the system, excluding Do Not Contact records.
All with Building — Active contacts assigned to a building, sorted by building then unit then name.
Do Not Call — Contacts marked Do Not Contact. See Restoring a Contact if a record was marked by mistake.
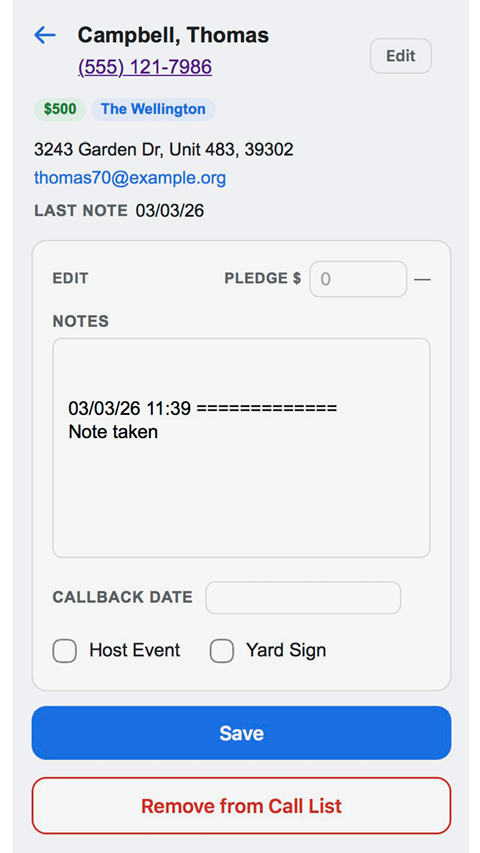
3Reading a Contact Card
Each contact appears as a card in the list. The card shows the contact's name, phone number, and any relevant badges.
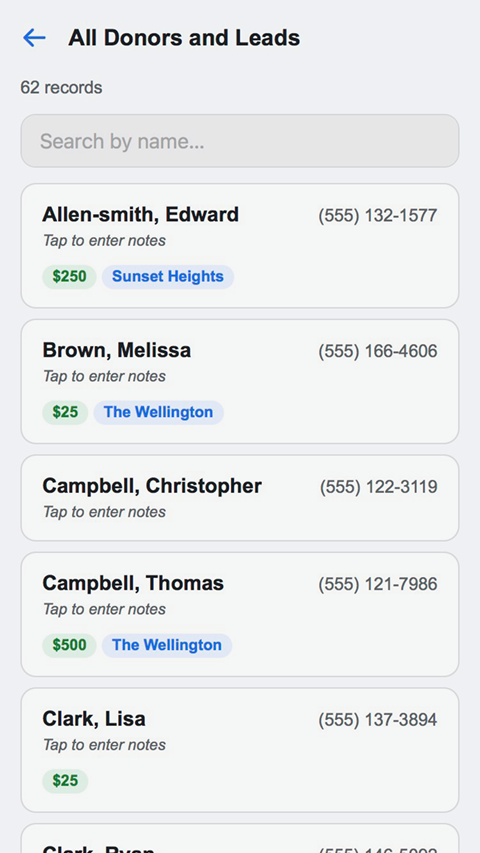
Sample contact cards showing name, phone, and badges
Badges provide at-a-glance information:
$250 Current campaign donation recorded
Callback: 03/15/26 Callback date is set
Sunset Towers Building assignment
Jen22 $100 Historical donation from a prior campaign
KKO24 $50 Historical donation from a prior campaign
On the detail screen, an HH (household) line may appear showing donations made by other members of the same household.
The phone number shown on the card is plain text — not tappable. To call a contact, tap the card to open the detail screen where a tappable phone link is available.
4Opening a Contact Detail
Tap anywhere on a contact card to open the detail screen for that contact.
The detail screen showing contact info and edit fields
The top section shows read-only contact information:
- ·Name and tappable phone link — tap the phone number to call directly
- ·Donation and Building badges if applicable
- ·Address, email (tappable), and Last Save date
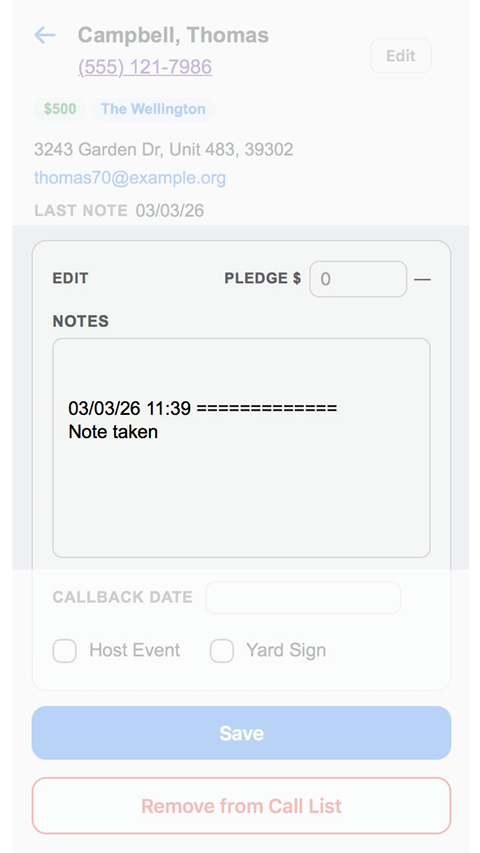
Below the contact info is the Edit section where you can update notes, callback date, pledge amount, and other fields.
Tap the ← back arrow to return to the list. If you have made changes without saving, you will be asked to confirm before leaving.
5Adding and Editing Notes
There are two ways to add a note to a contact.
Add a Note button — the fastest option, especially for voice dictation.
The Add a Note slide-over panel
- 1Tap Add a Note at the top right of the Edit section. A panel slides in with a text field.
- 2Dictate or type your note.
- 3Tap Save & Next to prepend the note, save to the sheet, and return to the list — or tap Add & Continue to prepend the note and stay on the contact to make additional changes before saving.
Notes field — tap directly in the notes text area to edit.
- 1Tap the Notes field to open the keyboard.
- 2Type your note. Existing notes remain below — new entries are added at the top.
- 3Tap Save to write the changes to the sheet.
The Last Save date shown in the contact info section updates to today's date every time you save.
6Setting a Callback Date
Use the Callback Date field to schedule a follow-up call. Contacts with a callback date appear in the All Call Backs list, sorted earliest first.
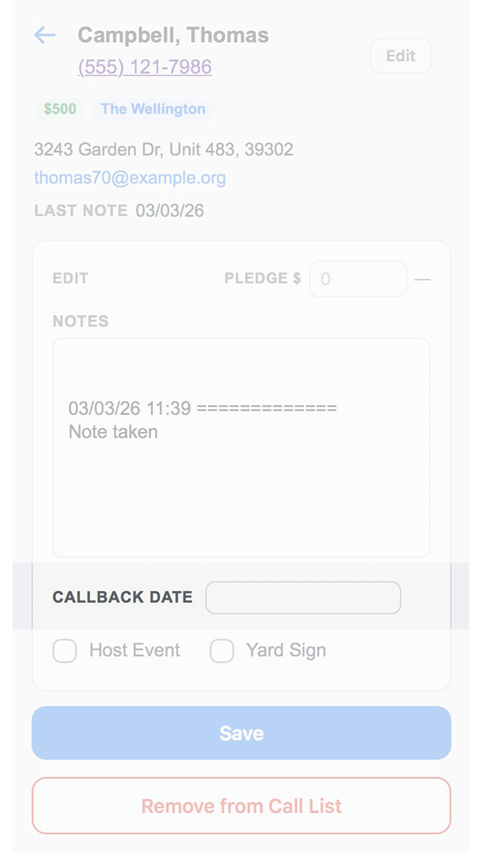
The Callback Date picker in the Edit section
- 1Tap the Callback Date field to open the date picker.
- 2Select the desired date.
- 3Tap Save to store the date.
When you save a contact that already has a callback date and you have not changed it, a popup appears asking what to do with the existing date:
- ·Clear — removes the callback date.
- ·New — lets you pick a new date before saving.
- ·Keep — leaves the date unchanged and proceeds with saving.
7Pledge Amount
The Pledge field records a financial commitment from a contact. It appears at the top right of the Edit section.

The Pledge $ field at the top of the Edit section
- 1Tap the Pledge $ field and enter a whole dollar amount. No decimals are allowed.
- 2The pledge date next to the field updates immediately to today's date as you type.
- 3Tap Save to store both the amount and the date.
8Campaign Activity Checkboxes
Four checkboxes in the Edit section let you flag a contact's willingness to help with campaign activities. They appear in a 2×2 grid.

Host Event, Yard Sign, Volunteer, and Walk With
Host Event — Contact is willing to host a campaign event.
Yard Sign — Contact wants a yard sign.
Volunteer — Contact is willing to volunteer.
Walk With — Contact is willing to walk with the candidate.
Tap Save after checking or unchecking any box. Each checkbox automatically records the date of the change in the sheet — you do not need to enter a date manually.
9Removing from Call List
If a contact requests not to be contacted, use the Remove from Call List button at the bottom of the detail screen. This marks them as Do Not Contact and removes them from all active lists.
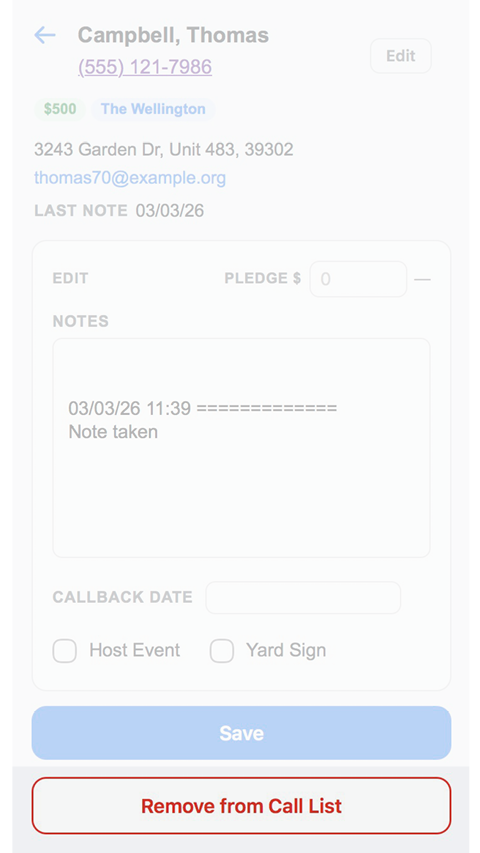
The Remove button and the type-to-confirm overlay
- 1Tap Remove from Call List at the bottom of the detail screen.
- 2A confirmation screen appears. Type the word Remove exactly.
- 3Tap Confirm. The contact is immediately removed from the current list.
10Restoring a Contact
Contacts marked Do Not Contact appear in the Do Not Call list. From there you can restore a contact if they were marked by mistake or have changed their mind.
The Restore to Call List button on a Do Not Call record
- 1Open the Do Not Call list from the home screen.
- 2Tap the contact you want to restore.
- 3Tap Restore to Call List at the bottom of the screen.
- 4Type the word Restore exactly in the confirmation field.
- 5Tap Confirm. The contact is restored and you are returned to the home screen.
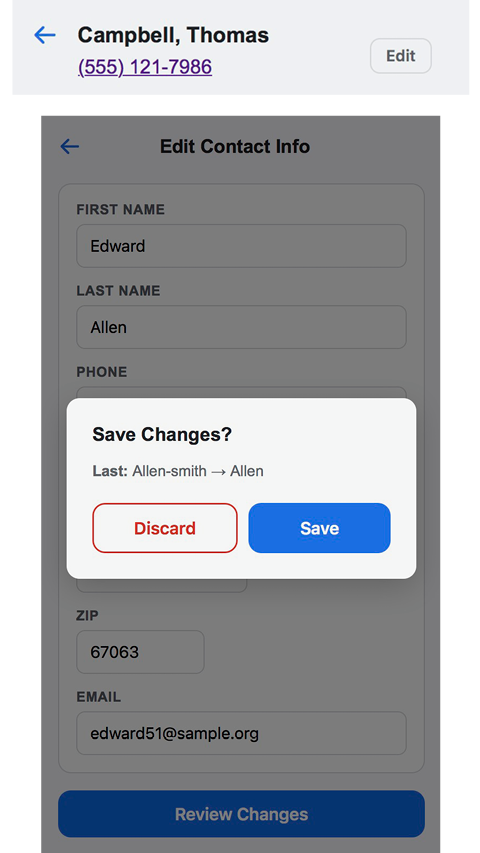
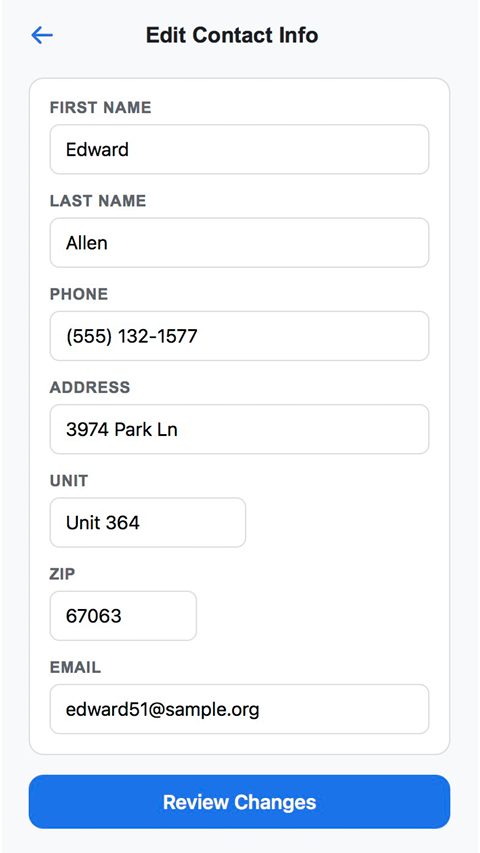
11Editing Contact Info
Basic contact details such as name, phone, address, and email can be updated directly from the detail screen using the Edit button in the upper right corner.
The Edit button opens the contact info editor
- 1Tap the small Edit button in the upper right of the detail screen.
- 2A panel slides in with fields for First, Last, Phone, Address, Unit, Zip, and Email.
- 3Make your changes. Name and address fields auto-capitalize. Phone accepts digits only. Zip must be exactly 5 digits. Email is validated before proceeding.
- 4Tap Review Changes. A summary of only the changed fields is shown.
- 5Tap Save to write the changes, or Discard to cancel.
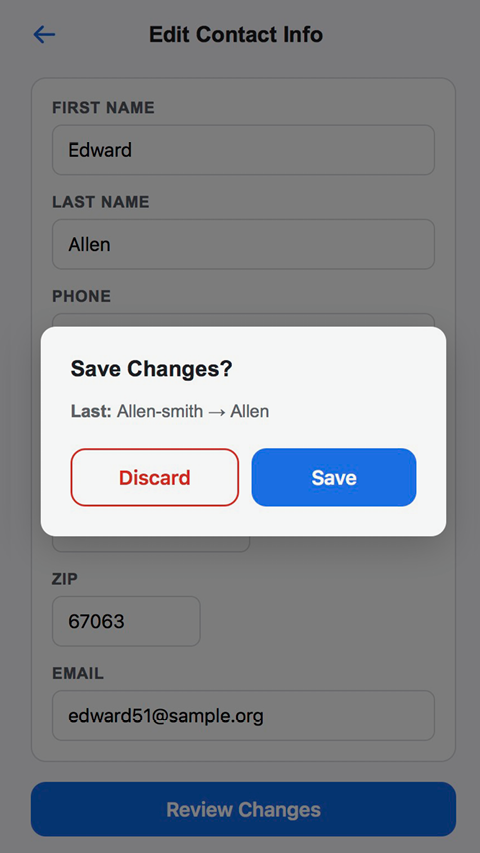
The confirm overlay showing before and after values